
How to Turn On Two-Factor Authentication: A Safe Step-by-Step Guide
Two-factor authentication adds a second step to your login, so a stolen password alone is not enough to access your account. This guide explains how to turn it on safely, which 2FA method to choose, how to save backup codes, and what to do if something goes wrong.
The goal is not just to enable 2FA quickly. The goal is to enable it without locking yourself out, without relying on a weak recovery method, and without choosing a second factor that gives you less protection than you think.
Quick answer
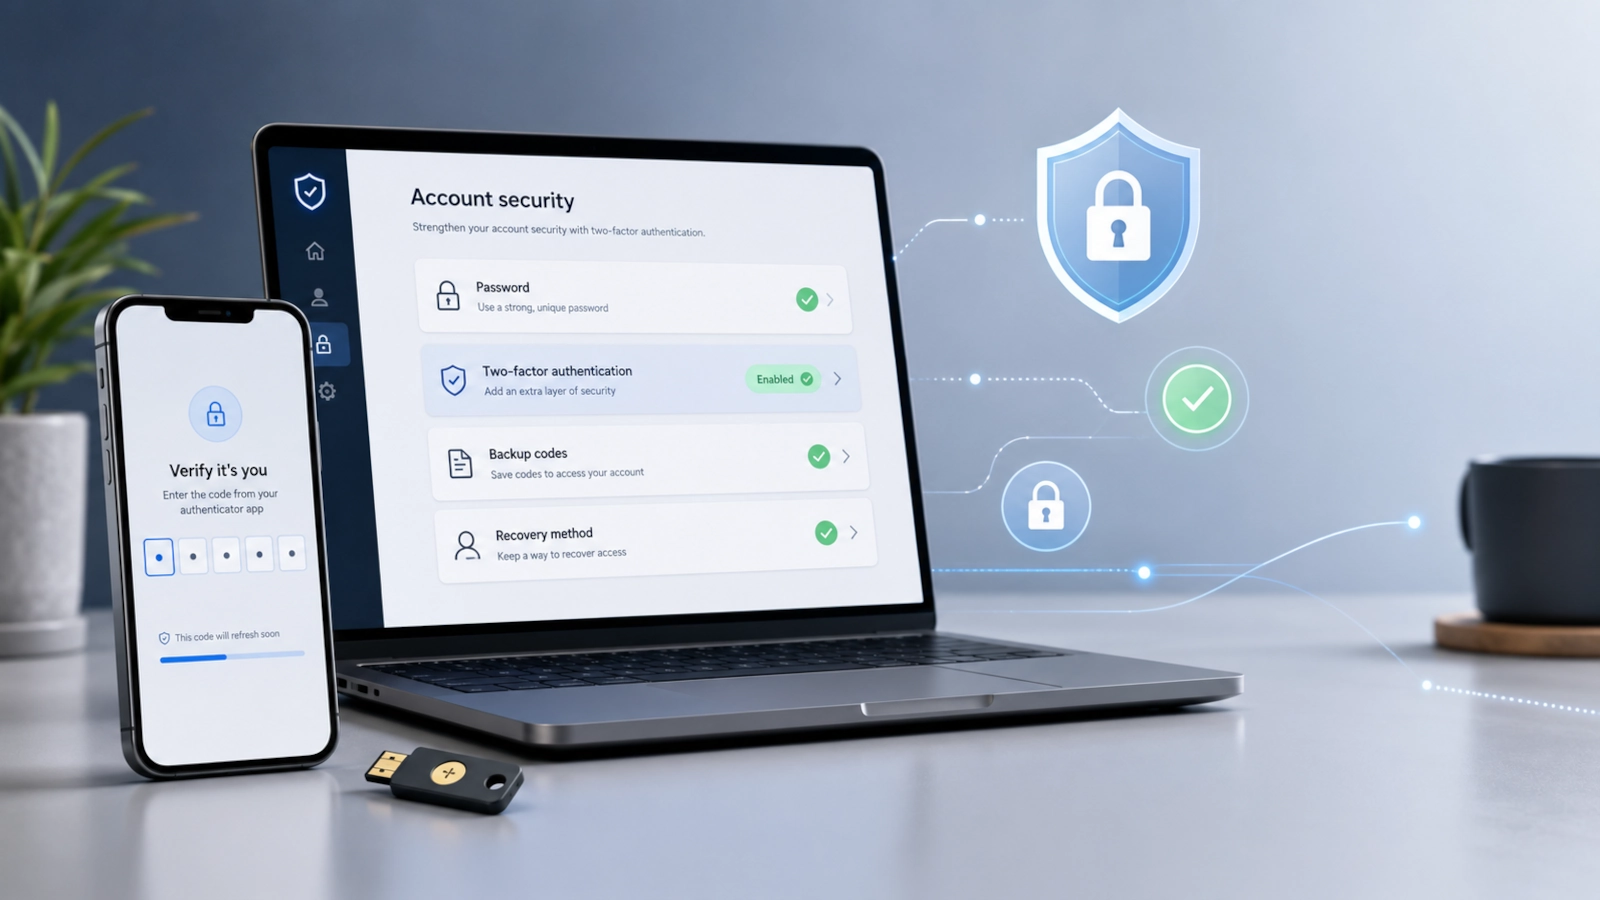
To turn on two-factor authentication, open your account security settings, find Two-Factor Authentication, Two-Step Verification, Multi-Factor Authentication, or Login Verification, choose a method such as an authenticator app, passkey, security key, push notification, SMS, or email code, confirm the setup code, and save your backup codes before leaving the page.
For the safest setup, do this in order:
- Secure your password first with a long, unique password.
- Add 2FA using an authenticator app, passkey, or security key when available.
- Save backup codes somewhere safe.
- Add a second recovery method.
- Sign out once and test that the second step works.
Before you start, it is smart to review these related guides:
If you only have time for one improvement today, turn on 2FA for your main email account first. Your email is often the recovery key for many other accounts.
What two-factor authentication means
Two-factor authentication, often shortened to 2FA, adds another proof of identity after your password.
A normal login usually uses one factor:
- Password = something you know.
A stronger login uses a second factor:
- Authenticator app, 2FA code, passkey, security key, phone prompt or SMS code = something you have.
- Face unlock, fingerprint or device biometric unlock = something you are, depending on the device and account system.
You may also see these terms:
| Term | Meaning |
|---|---|
| 2FA | Two-factor authentication. A second login step after your password. |
| MFA | Multi-factor authentication. A broader term for using two or more factors. |
| Two-step verification | A common consumer-friendly name for 2FA or MFA. |
| Authenticator app | An app that generates time-based codes, usually changing every 30 seconds. |
| 2FA code | A temporary code used to confirm that you have access to a second factor. |
| Passkey | A modern sign-in method based on cryptographic keys stored on your device or password manager. |
| Security key | A physical hardware key, often used with FIDO/U2F/WebAuthn, that confirms your login. |
The important idea is simple: if someone steals your password, they still need the second step to get in.
Best 2FA methods, ranked from safest to weakest
Not every 2FA method gives the same level of protection. Some methods are very strong against phishing. Others are better than nothing, but easier to intercept, trick, or lose.
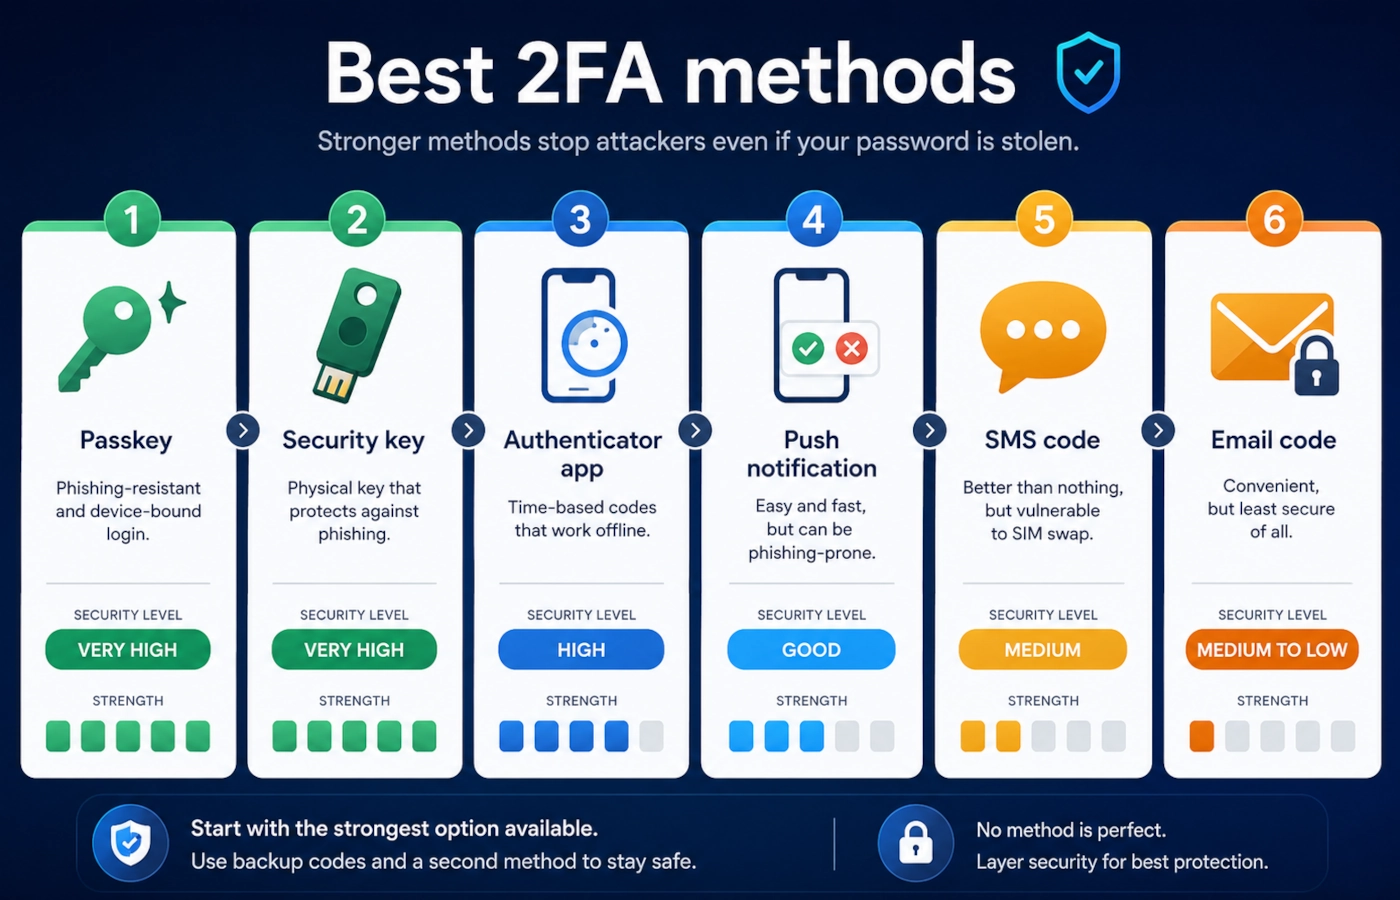
| Method | Security level | When to use it |
|---|---|---|
| Passkey | Very high | Use it when the account supports it and you can manage recovery safely. |
| Hardware security key | Very high | Use it for important accounts, work accounts, developer accounts and your main email. |
| Authenticator app | High | Best practical choice for most people when passkeys or hardware keys are not available. |
| Push notification | Good | Convenient, but read every prompt carefully and avoid approving unexpected requests. |
| SMS code | Medium | Better than no 2FA, but weaker than authenticator apps, passkeys or security keys. |
| Email code | Medium to low | Useful as a recovery option, but not ideal as your only second factor. |
The safest practical choice for most people
For most people, the best balance is:
- Passkey when available.
- Authenticator app as a strong general option.
- Backup codes stored safely.
- A second recovery method in case your phone is lost.
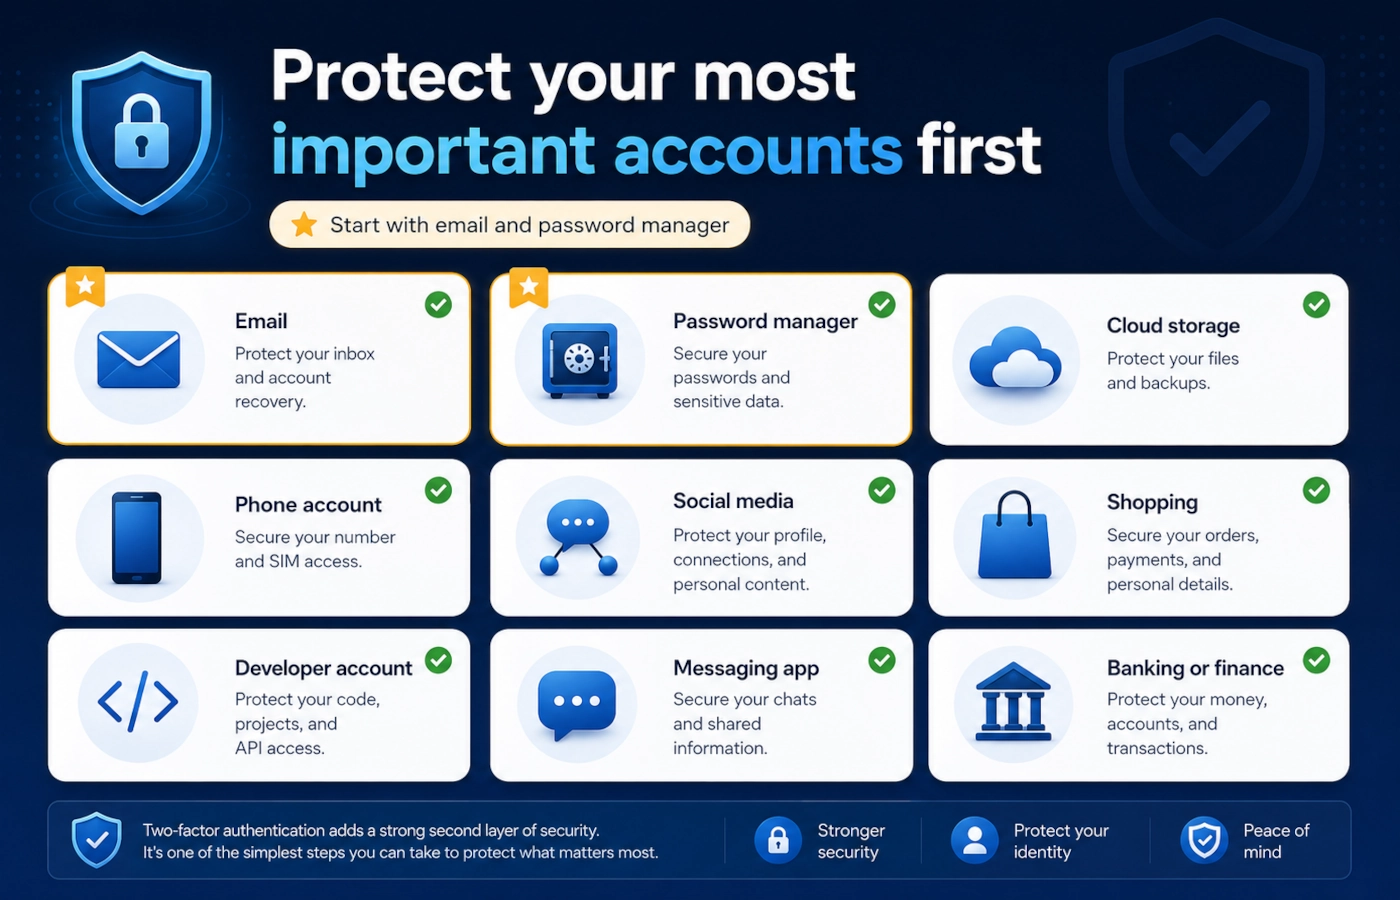
For high-value accounts, such as your main email, password manager, cloud storage, bank, domain registrar, hosting provider, GitHub account or business accounts, consider adding a hardware security key as well.
Before you turn on 2FA
Do not rush this step. Most 2FA problems happen because people enable it quickly, then lose their phone, delete an authenticator app, change number, or forget to save backup codes.
Before enabling 2FA, check this list:
- Update your recovery email. Make sure it is active and secure.
- Update your phone number. Remove old numbers you no longer control.
- Install an authenticator app if needed. Examples include Google Authenticator, Microsoft Authenticator, 1Password, Bitwarden, Aegis, Ente Auth or another trusted app.
- Prepare your password manager. Save backup codes and recovery information there if your password manager is secure and protected by 2FA.
- Keep your device unlocked and connected. Do not start setup with a nearly dead phone or unstable internet connection.
- Save backup codes. Download, print or store them securely before closing the setup page.
- Do not close the setup page too early. Finish verification first.
- Know how account recovery works. Some services may take days to verify your identity if you lose access.
A good 2FA setup should protect you from attackers without making your own account impossible to recover.
Universal steps to turn on 2FA
Every website has a slightly different interface, but the setup flow is usually similar.
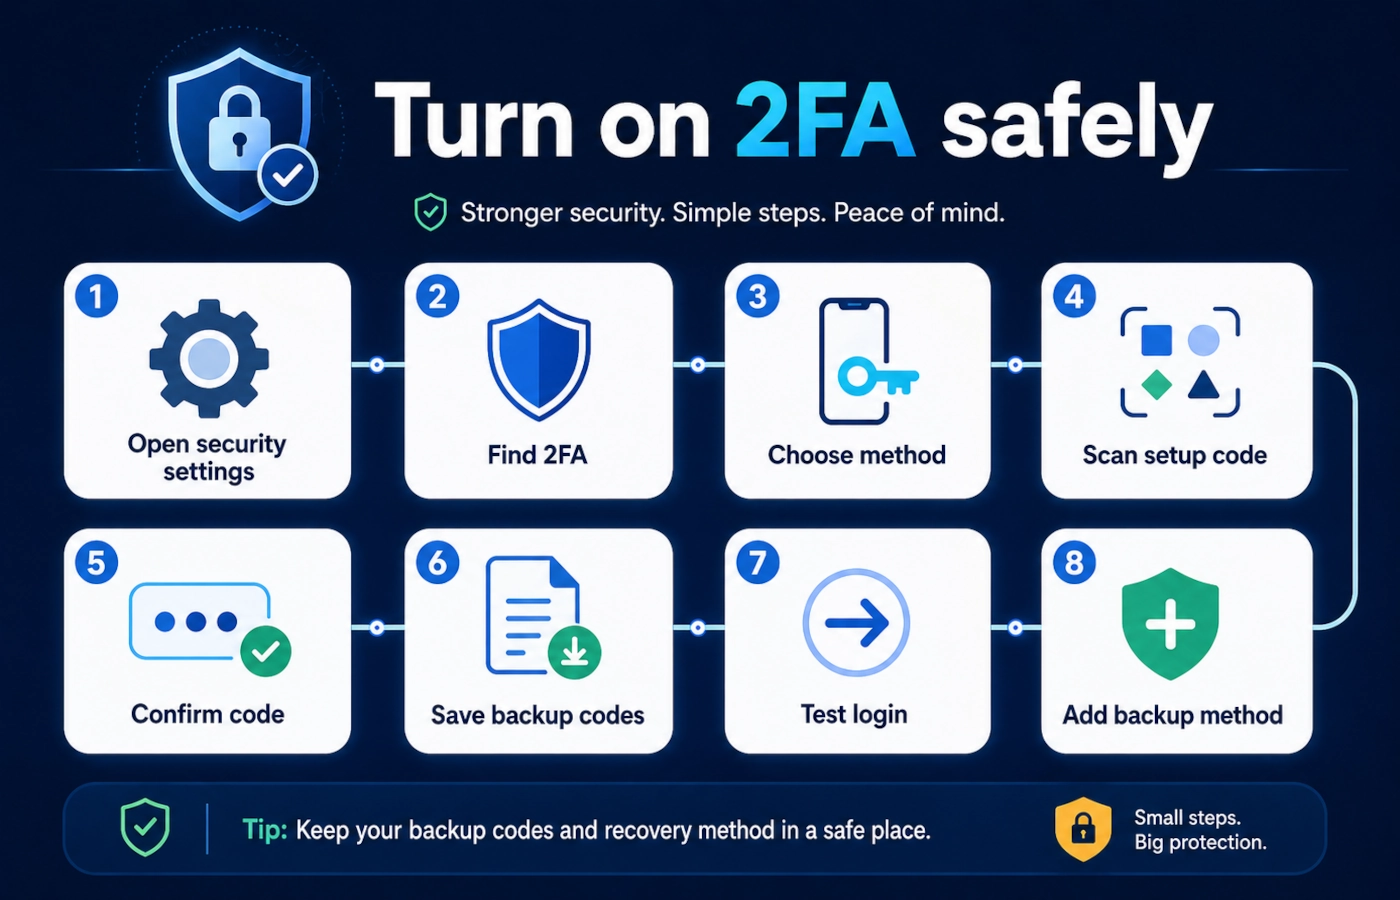
Step 1 — Open account security settings
Sign in to the account you want to protect and look for one of these areas:
- Security
- Login and security
- Password and security
- Sign-in and security
- Account settings
- Privacy and security
- Accounts Center
Use the official website or official app only. Do not enable 2FA from a link in a suspicious email or message.
Step 2 — Find two-factor authentication or two-step verification
Look for a setting called:
- Two-Factor Authentication
- 2-Step Verification
- Two-Step Verification
- Multi-Factor Authentication
- Login Verification
- Security verification
- Passkeys and security keys
If you cannot find it, search inside the account settings for 2FA, two-step, verification, authenticator, or security key.
Step 3 — Choose your 2FA method
Choose the strongest method that the service supports and that you can manage safely.
Recommended order:
- Passkey or hardware security key.
- Authenticator app.
- Push notification with number matching or clear login details.
- SMS code only if stronger options are not available.
- Email code as a backup, not as the main protection.
If the service lets you add more than one method, add at least two. For example: authenticator app + backup codes, or passkey + recovery code.
Step 4 — Scan the QR code or enter the setup key
If you choose an authenticator app, the service will usually show a QR code.
Open your authenticator app, add a new account, and scan the QR code. If scanning does not work, choose the manual setup option and copy the setup key carefully.
Important: do not share the QR code, setup key, 2FA code or backup codes with anyone. A real support agent should not ask you for them.
Step 5 — Enter the verification code
Your authenticator app or device will show a temporary code. Enter that code on the setup page to confirm that the second factor works.
If the code fails:
- check that the device time is correct;
- wait for the next code and try again;
- make sure you scanned the right QR code;
- make sure you did not add the same account twice by mistake.
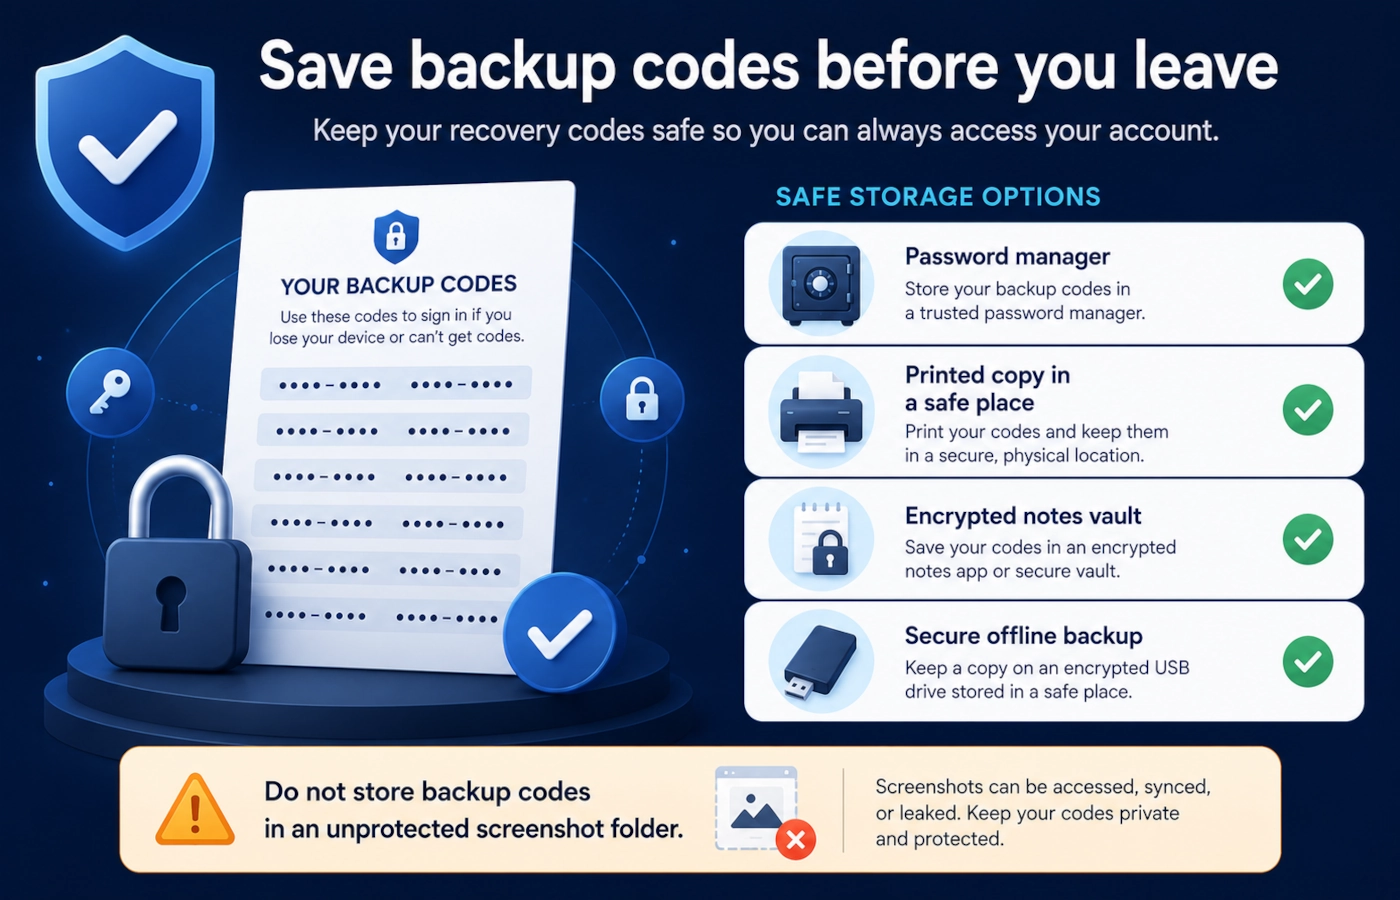
Step 6 — Save backup codes
Backup codes are emergency codes you can use if your normal 2FA method is unavailable.
Save them before closing the page. Good options include:
- your password manager;
- a printed copy stored in a safe place;
- an encrypted notes vault;
- a secure offline backup.
Do not save backup codes in the same unprotected email inbox that the account uses for recovery.
Step 7 — Test your login
After setup, sign out and sign in again to confirm that 2FA is actually active.
During the test, check that:
- the password works;
- the second step appears;
- the code or passkey works;
- backup options are visible;
- you can access security settings after logging in.
Do not skip this step. A setup that looks complete but has not been tested can create problems later.
Step 8 — Add a second backup method
If the account supports it, add a second method after the first one works.
Useful combinations:
- authenticator app + backup codes;
- passkey + recovery email;
- security key + authenticator app;
- phone prompt + backup codes;
- two hardware security keys, one daily key and one backup key.
This is especially important for accounts you cannot afford to lose.
How to turn on 2FA on popular accounts
Use these mini-guides as a starting point. Interfaces change, so the exact labels may vary slightly. Always use the official app or official website for the service.
How to turn on 2FA for Google or Gmail
- Open your Google Account.
- Go to Security.
- Under How you sign in to Google, select 2-Step Verification.
- Choose a passkey, Google prompt, authenticator app, security key, phone number or backup codes.
- Complete the verification step and save backup codes.
Full guide planned: How to Turn On 2FA for Your Google Account.
How to turn on 2FA for Apple Account or iPhone
- On iPhone or iPad, open Settings.
- Tap your name.
- Go to Sign-In & Security.
- Turn on Two-Factor Authentication if it is not already active.
- Confirm your trusted phone number and trusted devices.
If you use a Mac, you can usually find the same option in System Settings under your Apple Account.
Full guide planned: How to Turn On 2FA on iPhone and Apple Account.
How to turn on 2FA for Microsoft or Outlook
- Open your Microsoft account security page.
- Go to Advanced security options.
- Find Two-step verification.
- Turn it on and choose Microsoft Authenticator, another authenticator app, phone or email where available.
- Save your recovery code and update security info.
If this is a work or school account, your organization may control which methods are allowed.
How to turn on 2FA for Facebook
- Open Facebook settings.
- Go to Accounts Center.
- Open Password and security.
- Choose Two-factor authentication.
- Select the account and choose an authenticator app, security key or SMS if available.
Use an authenticator app or security key when possible. Avoid relying only on an old phone number.
How to turn on 2FA for Instagram
- Open Instagram settings.
- Go to Accounts Center.
- Open Password and security.
- Choose Two-factor authentication.
- Select Instagram and choose an authenticator app, security key or SMS if available.
After setup, save recovery codes and check that your email and phone number are current.
How to turn on two-step verification for WhatsApp
WhatsApp uses a different style of two-step verification. Instead of a normal authenticator app code, it usually asks you to create a six-digit PIN.
- Open WhatsApp.
- Go to Settings.
- Tap Account.
- Tap Two-step verification.
- Turn it on, create a six-digit PIN, and add an email address for PIN recovery.
Never share your WhatsApp verification code or two-step PIN with anyone.
How to turn on 2FA for Amazon
- Open your Amazon account.
- Go to Login & Security.
- Find Two-Step Verification.
- Choose SMS or an authenticator app if available.
- Complete the code verification and add a backup method.
Because Amazon accounts may store addresses, payment methods and order history, 2FA is strongly recommended.
How to turn on 2FA for GitHub
- Open GitHub.
- Click your profile picture and open Settings.
- Go to Password and authentication.
- Under Two-factor authentication, choose a TOTP app or another supported method.
- Save recovery codes and add extra recovery methods such as a security key if available.
If you use GitHub for work, open-source projects, websites or code deployment, 2FA should be treated as essential.
How to turn on 2FA for Discord
- Open Discord user settings.
- Go to My Account or the account security section.
- Choose Multi-Factor Authentication.
- Add a passkey/security key, authenticator app or SMS where available.
- Save backup codes before leaving the page.
Discord accounts are often targeted by scams, fake giveaways and malicious links. 2FA helps, but you should still avoid approving unexpected login prompts.
How to know if 2FA is enabled
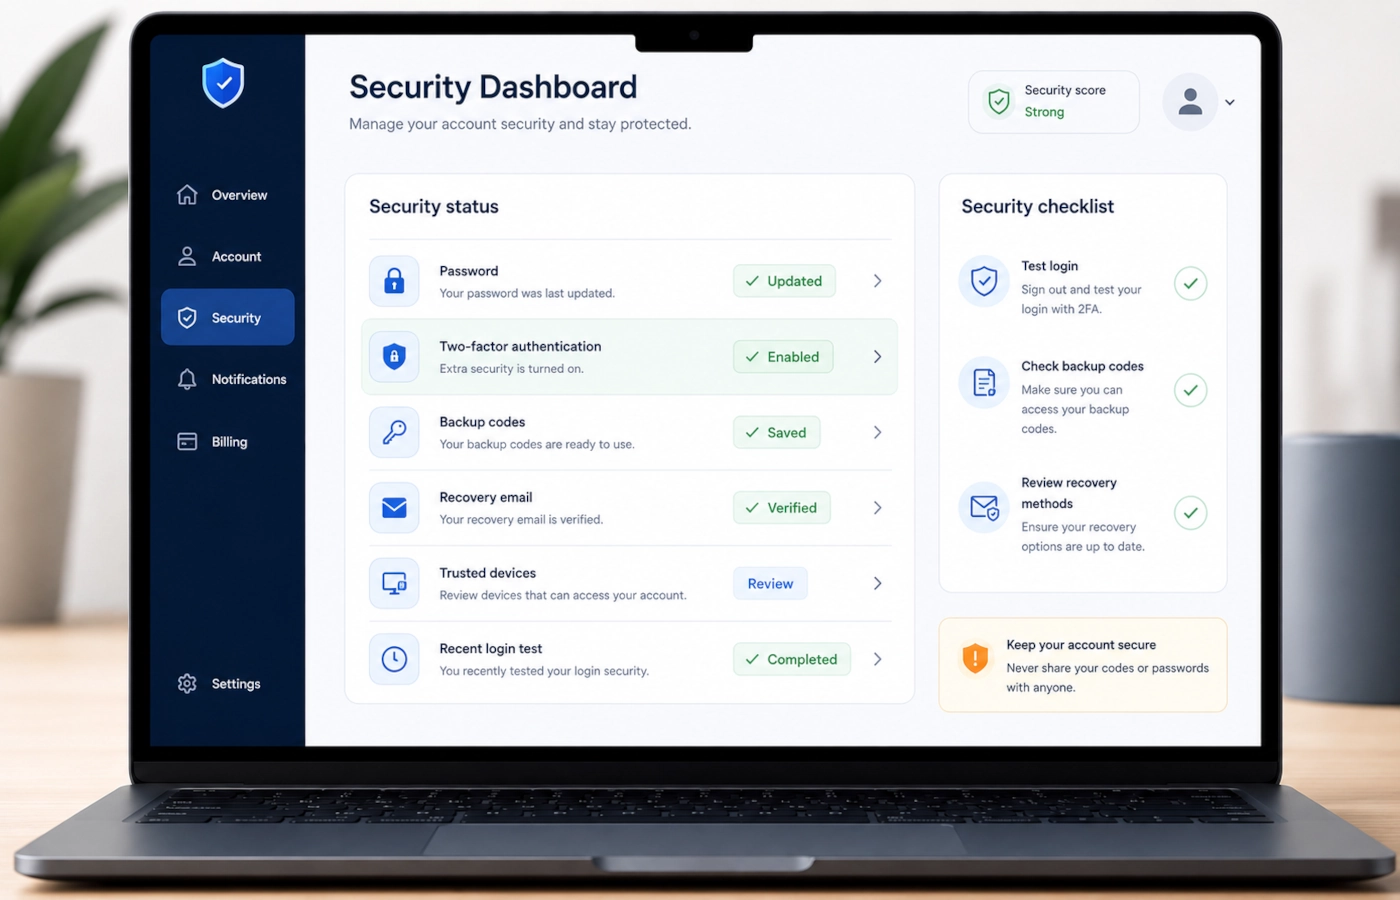
You can usually confirm 2FA is enabled by checking your account security page, looking for On, Enabled, Active, Set up, or Protected next to two-factor authentication, and signing out once to test whether a second step is required.
Use this checklist:
- The account security page says 2FA, MFA or two-step verification is active.
- At least one second-factor method is listed.
- Backup codes are available or have been downloaded.
- Your recovery email and phone number are current.
- A test login asks for a second step.
- You receive a login alert when signing in from a new device.
If you can sign in from a new browser with only your password, 2FA may not be enabled correctly, or the browser may still be trusted from a previous login.
Why you can’t turn on 2FA
If 2FA does not work, the cause is usually one of these problems.
Phone number not verified
Some services require a verified phone number before you can enable SMS or recovery options. Update your number and verify it first.
Account managed by work or school
Work and school accounts may be controlled by an administrator. You may not be able to choose every 2FA method yourself.
Region or age restrictions
Some features vary by country, account age, account type or age settings.
Authenticator app time is not synced
Authenticator codes depend on time. If your phone time is wrong, codes may fail. Set your device time to automatic and try again.
Security settings temporarily locked
After suspicious activity, recent password changes or recovery attempts, some services temporarily block security changes.
Suspicious activity on the account
If the service detects unusual login attempts, it may require extra verification before letting you change security settings.
Missing recovery email
Some accounts require a recovery email before enabling stronger security settings.
The platform does not support your preferred method
Not every service supports passkeys, security keys or authenticator apps. If only SMS is available, SMS is still better than no second factor, but you should secure the account with a strong unique password too.
What to do if you lose access to 2FA
Losing access to your second factor can be stressful, but do not panic and do not trust random “account recovery” services.
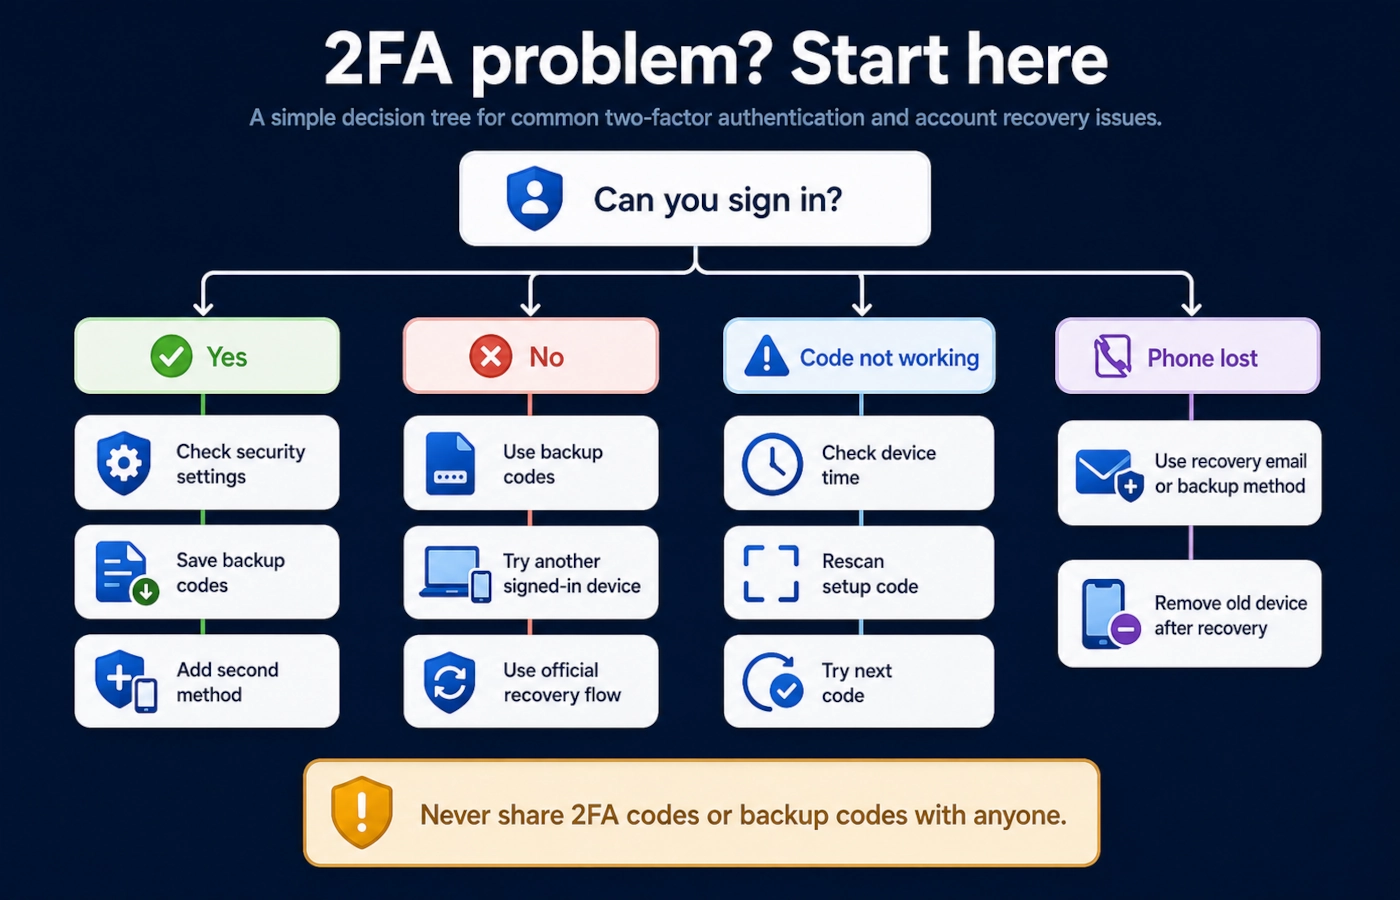
Start with the safest recovery options.
1. Use backup codes
If you saved backup codes, use one to sign in. After you regain access, generate a new set of backup codes if the service supports it, because used codes may become invalid.
2. Use another signed-in device
Some services let you approve a login or change security settings from a device that is already signed in.
Check your phone, tablet, laptop or desktop browser before starting a full recovery process.
3. Use your recovery email or recovery phone
If backup codes are not available, use the official recovery email or phone options listed by the service.
Only use recovery links from the official website or official app. Be careful with emails that create urgency or ask for codes.
4. Use the official account recovery flow
Go directly to the official account recovery page for the service. Do not search for “support phone number” and call random results. Many fake support pages target people who are locked out.
5. Contact support only through official channels
Use help centers, official support portals or verified in-app support. Never give your password, 2FA code, backup code or authenticator QR code to anyone.
6. Do not buy recovery services
Do not pay strangers who claim they can recover Google, Apple, Instagram, WhatsApp, Amazon, Discord or GitHub accounts. Many are scams.
7. After recovery, reset password and update 2FA
Once you regain access:
- change the account password;
- remove old devices you no longer use;
- remove old phone numbers;
- add a new 2FA method;
- generate new backup codes;
- check recent login activity;
- review connected apps and sessions.
Should you use SMS, authenticator app, passkey, or security key?
For most people, an authenticator app is a strong and practical choice. If passkeys are available, use them. For your most important accounts, consider a hardware security key. Use SMS only if stronger options are not available.
Here is the practical decision path:
- Choose passkeys if the service supports them and you understand how your device or password manager syncs and recovers them.
- Choose a hardware security key for high-value accounts, especially email, password manager, developer tools and business accounts.
- Choose an authenticator app for most everyday accounts.
- Choose push notifications only if the prompt clearly shows what you are approving.
- Choose SMS only when the service does not support stronger options.
- Use email codes mainly as recovery, not as your only protection.
2FA is strongest when your password is also strong and unique. If you reuse the same password everywhere, turn on 2FA, then start replacing reused passwords with unique ones.
Common mistakes to avoid
Turning on 2FA without saving backup codes
This is the most common lockout mistake. Always save backup codes before leaving the setup page.
Using only an old phone number
If your only 2FA method is an old number, you may lose access when you change SIM, move country, lose the phone or stop using that number.
Approving login prompts without reading them
Attackers may try to trigger repeated push prompts and hope you approve one by mistake. If you receive a prompt you did not request, deny it and change your password.
Using SMS as the only recovery method
SMS is better than nothing, but it can be weaker than authenticator apps, passkeys or security keys. Add a stronger method when possible.
Deleting the authenticator app before moving codes
Before changing phones, transfer or reconfigure your authenticator codes. Do not erase the old phone until you have confirmed that every important code works on the new one.
Using the same weak password everywhere
2FA helps, but it does not make password reuse safe. Use a unique password for every important account.
Not securing your main email account first
Your email account is often used to reset passwords for other accounts. Protect it before less important accounts.
Saving backup codes in an unsafe place
Do not keep backup codes in plain text on a shared computer, in an unprotected screenshot folder, or in a cloud note that anyone can open.
Faster alternative
If you want the quickest safe improvement, do this:
- Turn on 2FA for your main email account.
- Use an authenticator app if available.
- Save backup codes.
- Turn on 2FA for your password manager, Apple/Google/Microsoft account, banking, cloud storage, Amazon, social accounts and GitHub.
This does not replace a full security review, but it gives you the biggest protection improvement quickly.
FAQ
How do I turn on two-factor authentication on my iPhone?
For your Apple Account, open Settings, tap your name, go to Sign-In & Security, and turn on Two-Factor Authentication if it is not already active. For individual apps on iPhone, open that app’s account security settings and look for 2FA, MFA, two-step verification or login verification.
How do I turn on 2 factor authentication?
Open the account’s security settings, find the two-factor authentication option, choose a method such as an authenticator app, passkey, security key or SMS, confirm the verification code, then save backup codes before leaving the page.
How do I know if 2FA is enabled?
Check the account security page. If 2FA is enabled, it usually says On, Enabled, Active, or shows one or more second-factor methods. You can also sign out and sign in from a new browser to confirm that a second step is required.
Where is 2 factor authentication in settings?
It is usually under Security, Login and security, Password and security, Sign-in and security, Privacy and security, or Accounts Center. Search inside settings for 2FA, two-step, verification, authenticator, passkey, or security key.
Why can’t I turn on two-factor authentication?
Common reasons include an unverified phone number, missing recovery email, account restrictions, work or school admin policies, suspicious activity, temporarily locked security settings, incorrect device time, or a platform that does not support your preferred 2FA method.
How do I activate 2FA on mobile?
Open the official app, go to account settings, then security settings. Look for Two-Factor Authentication, Two-Step Verification, or Multi-Factor Authentication. Choose your method, confirm the code, and save backup codes.
How do I set up 2FA on an Android phone?
For Google, open your Google Account and go to Security > 2-Step Verification. For other apps, open the app’s security settings and choose 2FA, MFA or two-step verification. If using an authenticator app, scan the QR code or enter the setup key, then confirm the code.
Is 2FA the same as Google Authenticator?
No. 2FA is the security concept: a second login step. Google Authenticator is one app that can generate 2FA codes. Other authenticator apps, passkeys, security keys, SMS codes and push notifications can also be used as second factors depending on the service.
How do I restore 2 factor authentication?
Use backup codes first. If you do not have them, try another signed-in device, recovery email, recovery phone number or the official account recovery process. After you regain access, set up 2FA again and save new backup codes.
Why turn on two-factor authentication?
Turn on 2FA because passwords can be leaked, guessed, reused or stolen by phishing. 2FA adds another barrier, so a stolen password alone is less likely to give an attacker access to your account.
How do I activate my authenticator account?
Install a trusted authenticator app, open the account’s 2FA setup page, scan the QR code or enter the setup key, then type the temporary code from the app into the website to confirm setup. Save backup codes before closing the page.
Is SMS 2FA safe enough?
SMS 2FA is better than no 2FA, but it is not the strongest option. If an authenticator app, passkey or hardware security key is available, use one of those instead. If SMS is your only option, keep your phone number updated and protect the account with a strong unique password.
Can I use more than one 2FA method?
Yes, and you should when the service allows it. A good setup can include an authenticator app, backup codes, a passkey and a hardware security key. Having more than one method reduces the chance of being locked out.
Related articles
Editorial sources
This guide was prepared using security guidance and official help documentation from the organizations below. Interface names and account settings can change over time, so always confirm the final steps inside the official security settings page for the service you are using.
- CISA — More than a Password
- Google Account Help — Turn on 2-Step Verification
- Google Account Help — Sign in with backup codes
- Apple Support — Two-factor authentication for Apple Account
- Apple Support — Get a verification code and sign in with two-factor authentication
- Microsoft Support — How to use two-step verification with your Microsoft account
- Microsoft Support — How to get a Microsoft account recovery code
- WhatsApp Help Center — About two-step verification
- Amazon Customer Service — What is Two-Step Verification?
- GitHub Docs — Configuring two-factor authentication
- GitHub Docs — Configuring two-factor authentication recovery methods
- Discord Support — Setting up Multi-Factor Authentication
- Discord Support — Recover your account when locked out of MFA
Last tested
Tested and reviewed on 2026-06-25 using official account security documentation for:
- Google Account 2-Step Verification
- Apple Account two-factor authentication
- Microsoft account two-step verification
- Facebook and Instagram account security settings
- WhatsApp two-step verification
- Amazon Two-Step Verification
- GitHub two-factor authentication
- Discord Multi-Factor Authentication